

Paste Paper Recipe
How to create colourful and textured papers for collage.

Thank you to all the lovely reponses to my first ever post on here. It’s so nice to already see the sense of community that this place has compared to some other social media sites, where I can feel like I’m posting a little into the void.
I thought I’d share the recipe for creating paste papers from Mark Hearld’s brilliant book ‘Raucous Invention-The Joy of Making’. You may have seen this technique in my collage on my first post here. I’m often asked about this process as I now use it regularly in my collage making, and combine it with my linocut prints into new compositions.
For those of you that aren’t familar with what paste paper is, I’ve taken this extract from Mark Hearld’s book:
‘Paste paper is a traditional process that’s been used in book binding since 17th century; bookbinders would have taken left over paste, added colour to it and used it as a means of making end papers, and papers to bind small books with'.’
It’s simply the use of flour and water with any colour pigment added which can then be painted onto paper and texturised.
I have loved Mark Hearld’s work for as long as I can remember, and always wanted to know how he created the beautful textures in his collages, so I was delighted to see this process explained in detail in his book. I set about trying it out and loved it!
Recipe:
-Mix six and a half parts water to one part flour (plain flour or cornflower) in a large saucepan (I use an old one as my mixture has a habit of burning!).
-Use a cup to measure out the flour and water, adding the water gradually to avoid lumps.
-Stir continually over a medium heat until it thickens and comes to the boil.
-Allow to boil gently for two minutes, (this is usually when mine burns at the bottom but those parts are sieved out) then take off the heat and allow to cool.
-Once cooled sieve to remove any lumps.
-Mix the paste with any strong pigment such as ink or acrylic paint (I use acrylic paint most of the time but have also used acrylic ink). I usually fill a few small bowls and add different colours at one time.
-Cover a large area with newspaper as it can get messy (it could be a big table or I use the top of my planchest). Paint onto sheets of paper with a large brush. You may want to mix the colours onto the paper as you paint.
-Texturise by dragging or pressing anything along the surface. I’ve used bubble wrap, old toothbrushes, old paint brushes, my fingers-anything works. I usually like to leave lots with paint brush textures so swirl the brushes along creating patterns.
Make sure you have a good amount of space to paste the papers and for them to dry as it can get very messy. You might need to experiment a few times to see what types of textures you prefer, and what colours you may want to blend too.
It’s a very enjoyable process and you can end up pasting for hours if you don’t keep an eye on the time!
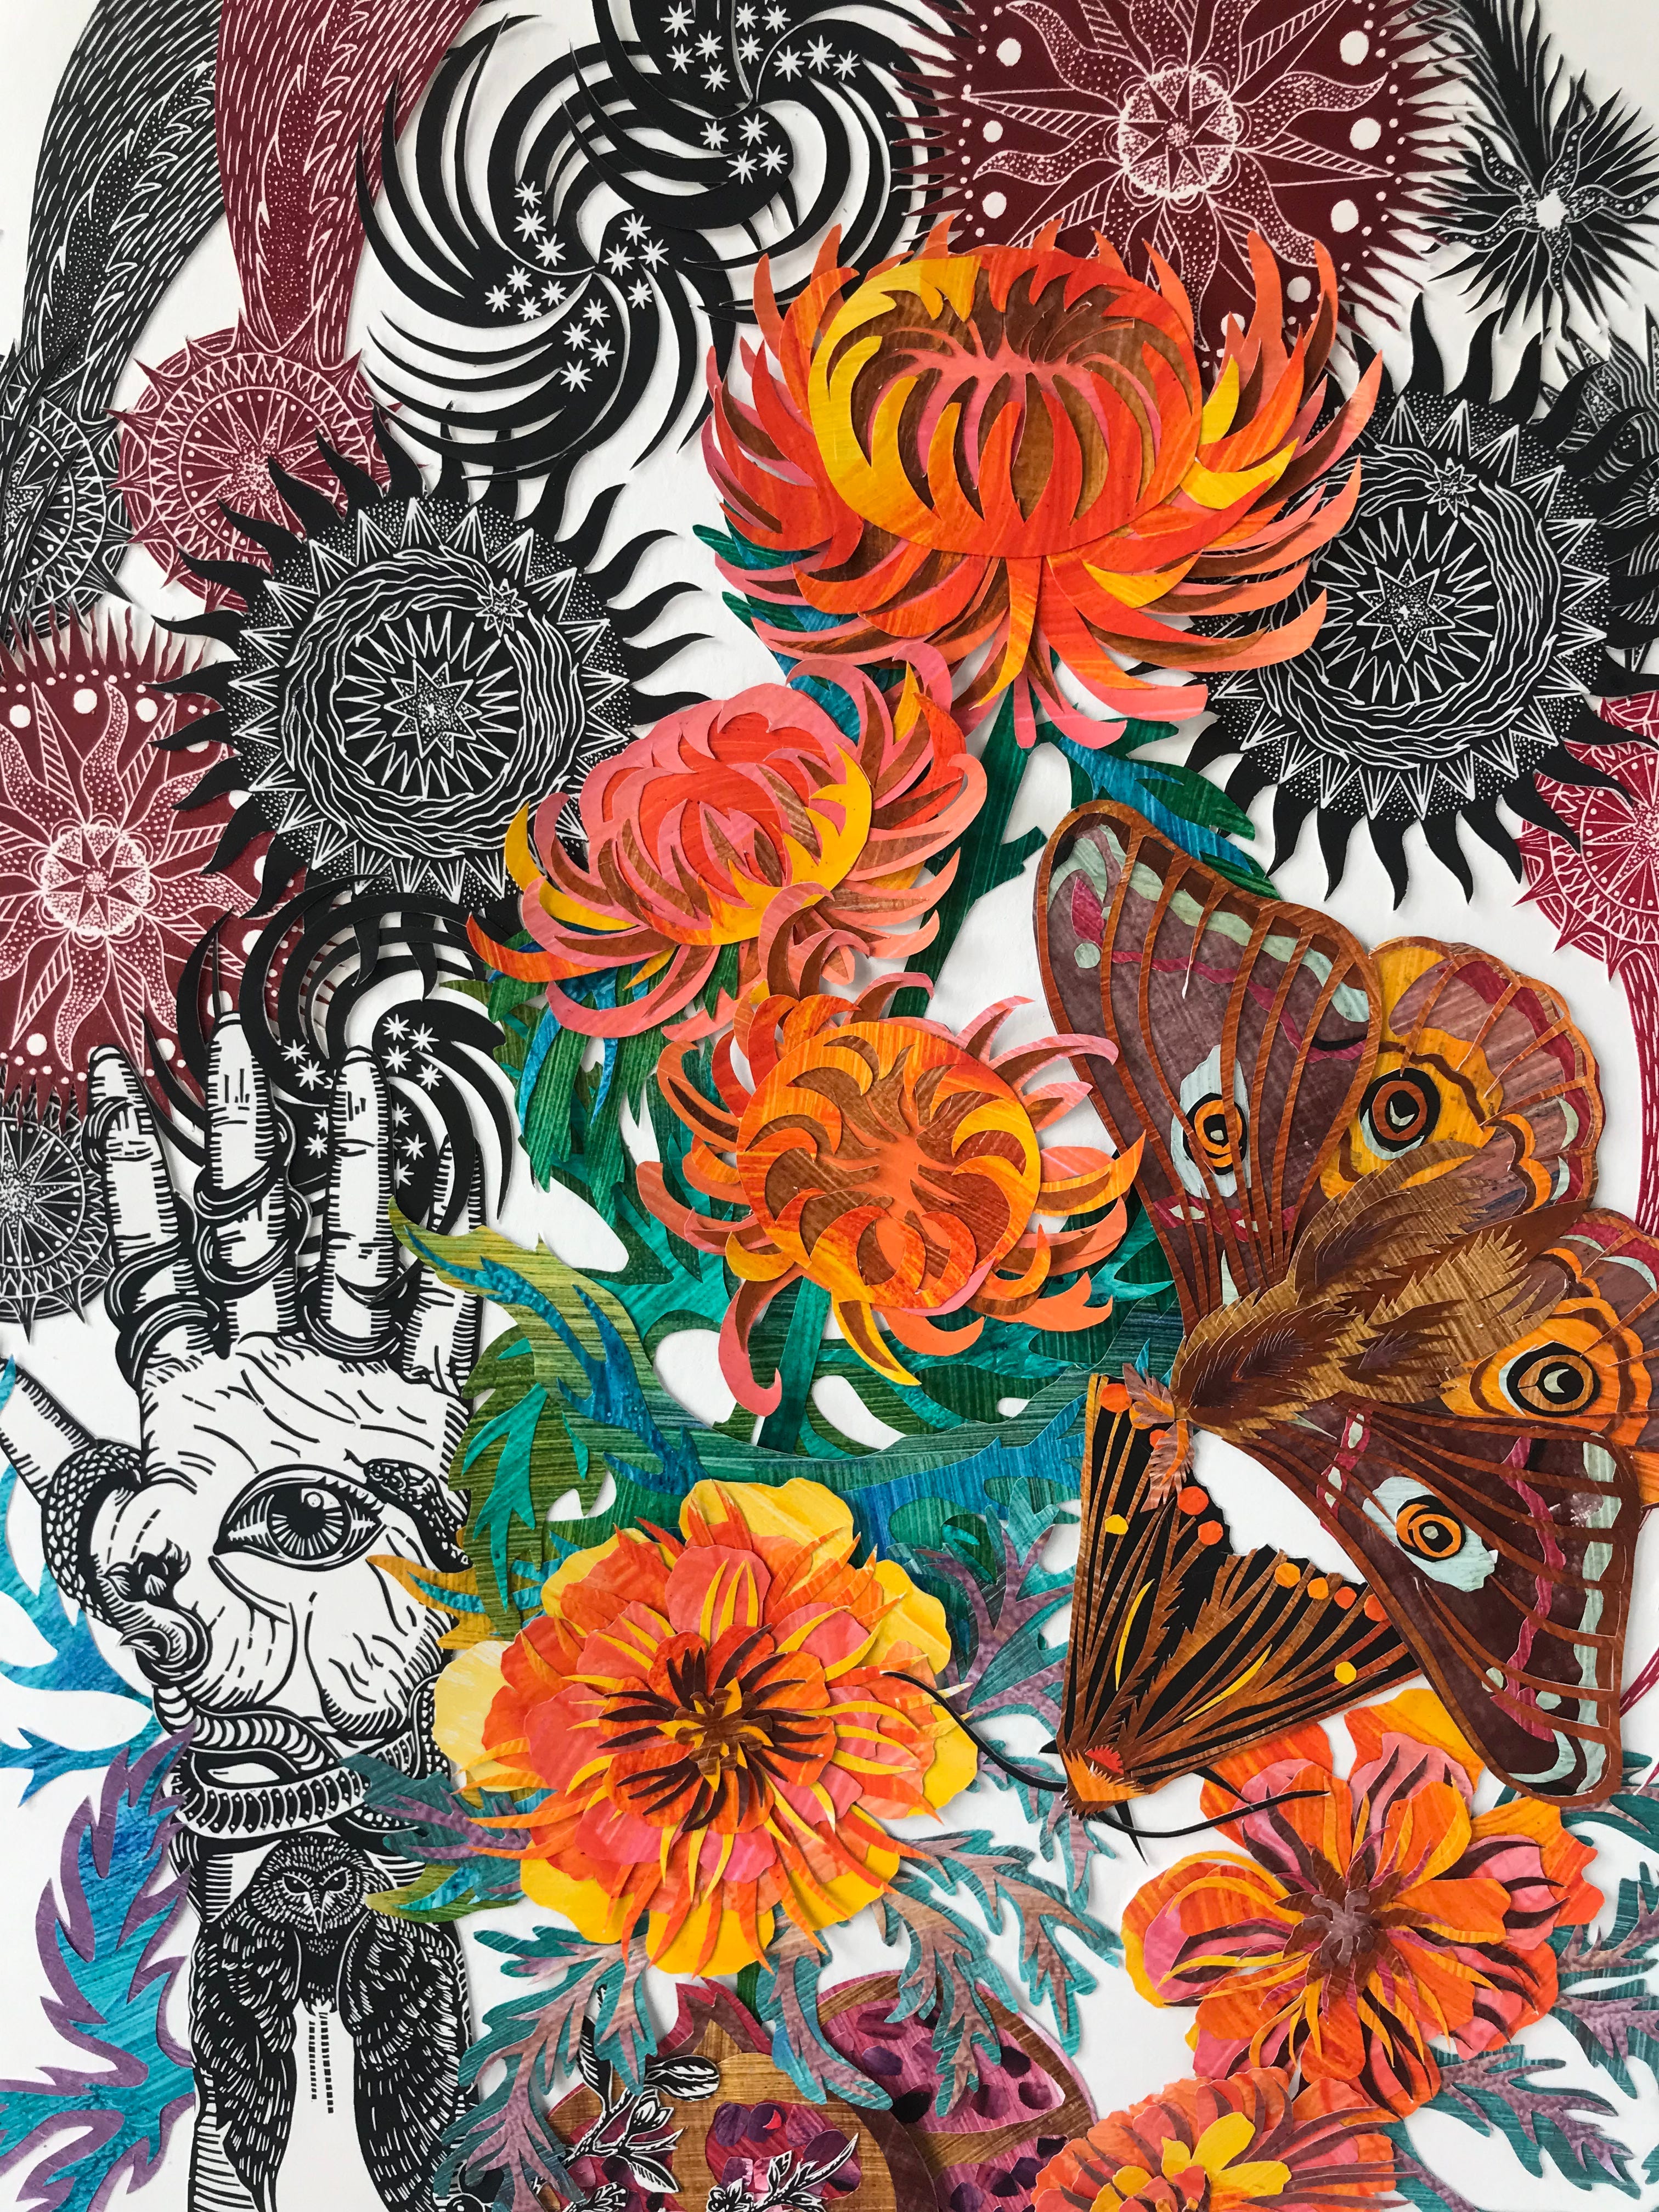
I’ve added an image of my collage ‘All In The Cosmos’ that includes some paste papers to give you an idea of textures created. You can see the textured brush marks on the chrysanthemums, moth and foilage. I decided that I just wanted these textures so didn’t do too much else to the paper. I’ve tried to treat it a little like a painting, and blended the colours on the paper quite quickly to create new colours that I wanted.
For a full description of this process and a bit more history about it, do have a look at Mark Hearld’s book ‘Raucous Invention-The Joy of Making’ published by St. Jude’s and Random Spectacular. Do also have a look at his collages which are so beautiful, and really are a riot of colour and texture.
I hope that some of you manage to give it a try, and I’ll and post a video of the texturising process soon.
Thank you very much if you have got this far, and I do hope that you enjoyed reading this post.
Can’t wait to read this book- thanks for the post!
Thank you for this post Cally. It’s very well written and describes the process so well. I love that collage you shared with the paste papers.